Showing posts with label gift. Show all posts

Friday, February 24, 2012

Chalkboard Candle Votives

On Monday I made candles and posted a tutorial!  I wanted to jazz them up a little bit.  

1.  Collect your supplies.  You will need a candle, chalk board paint, accent paint (optional), a paintbrush, and masking tape.  Make your own candle with this tutorial.  

2.  Mark off the space you want to paint with tape.  I couldn't find my stencil or masking tape-- so I used Scotch tape.  Mistake.  I highly recommend not using Scotch tape!!  Use your tape of choice and block off the top and bottom.  Paint chalkboard paint in-between the tape.

3.  Wait for your paint to dry and peel off the tape.  My edges are messy :/  Hopefully your lines are pretty!  I wanted to minimize my messy edge, so I painted a white stripe above my blue chalkboard paint.  

4.  Use chalk and draw or write something!  I drew a heart on one side and wrote LOVE on the other.
Something lovely for your home or a perfect affordable, adorable, and personalized gift!!

Have a great weekend!

xoxo,
Ashley

Thursday, February 23, 2012

How to Make Mint Tea Tutorial

I've come down with a rotten cold and tea is the only thing that makes me feel better.  Interestingly enough, my mint plants have grown a little out of hand and are hogging all the sunshine from their neighbor plants.  Serendipity?  Follow along to make your own mint tea!  
1.  Pick your mint leaves.  I picked leaves from peppermint, chocolate mint, and sweet mint varieties.  I live in Florida and have a year round garden.  If you live in a cold climate, you can buy a mint plant or buy fresh mint in the refrigerated herb section at the grocery store.  
2.  Rinse leaves with cold water to get the dirt off of them.  I usually fill my bowl with water and swish the leaves around.  Then let the dirt settle to the bottom and the leaves will float to the top.  I skim the surface of the water to collect my clean leaves.
2.  Heat your oven to around 180-200 degrees F.  Arrange your clean leaves in a single layer on a cookie sheet.  I lined mine with parchment paper. Pop your leaves in the oven and let them dry for up to 2 hours.

3.  Take your leaves out of the oven and let them cool.  Store the leaves in an air-tight jar.  Don't crumble the leaves until you are ready to prepare your tea for maximum freshness!
4.  To prepare your tea, crumple your leaves into tiny pieces.  How much tea you use is a matter of preference.  If you're unsure-- use less!  I use about 1 tablespoon for every 6 ounces of water-- plus 1 or 2 fresh, bruised mint leaves.  (Roll the leaf in between your fingers to bruise them.)  Add boiling water to your tea leaves and steep for 3 minutes.  If you have a tea strainer, use it.  If not, steep your tea and pour over a regular strainer into a cup.

Handmade tea makes a beautiful gift!

xoxo,
Ashley


P.S. Here are a few tips on growing and harvesting peppermint!

Monday, December 26, 2011

Christmas Ornaments for Kids Tutorial

I just got home from spending Christmas with my family in the north woods.  It was so wonderful to be together for the holidays!

My family waited until I got there to pick out a tree and we decorated it together.  I love seeing all of my ornaments from when I was little.  I know Christmas is over, but I wanted to share a couple ornaments I found that I had crafted when I was young.
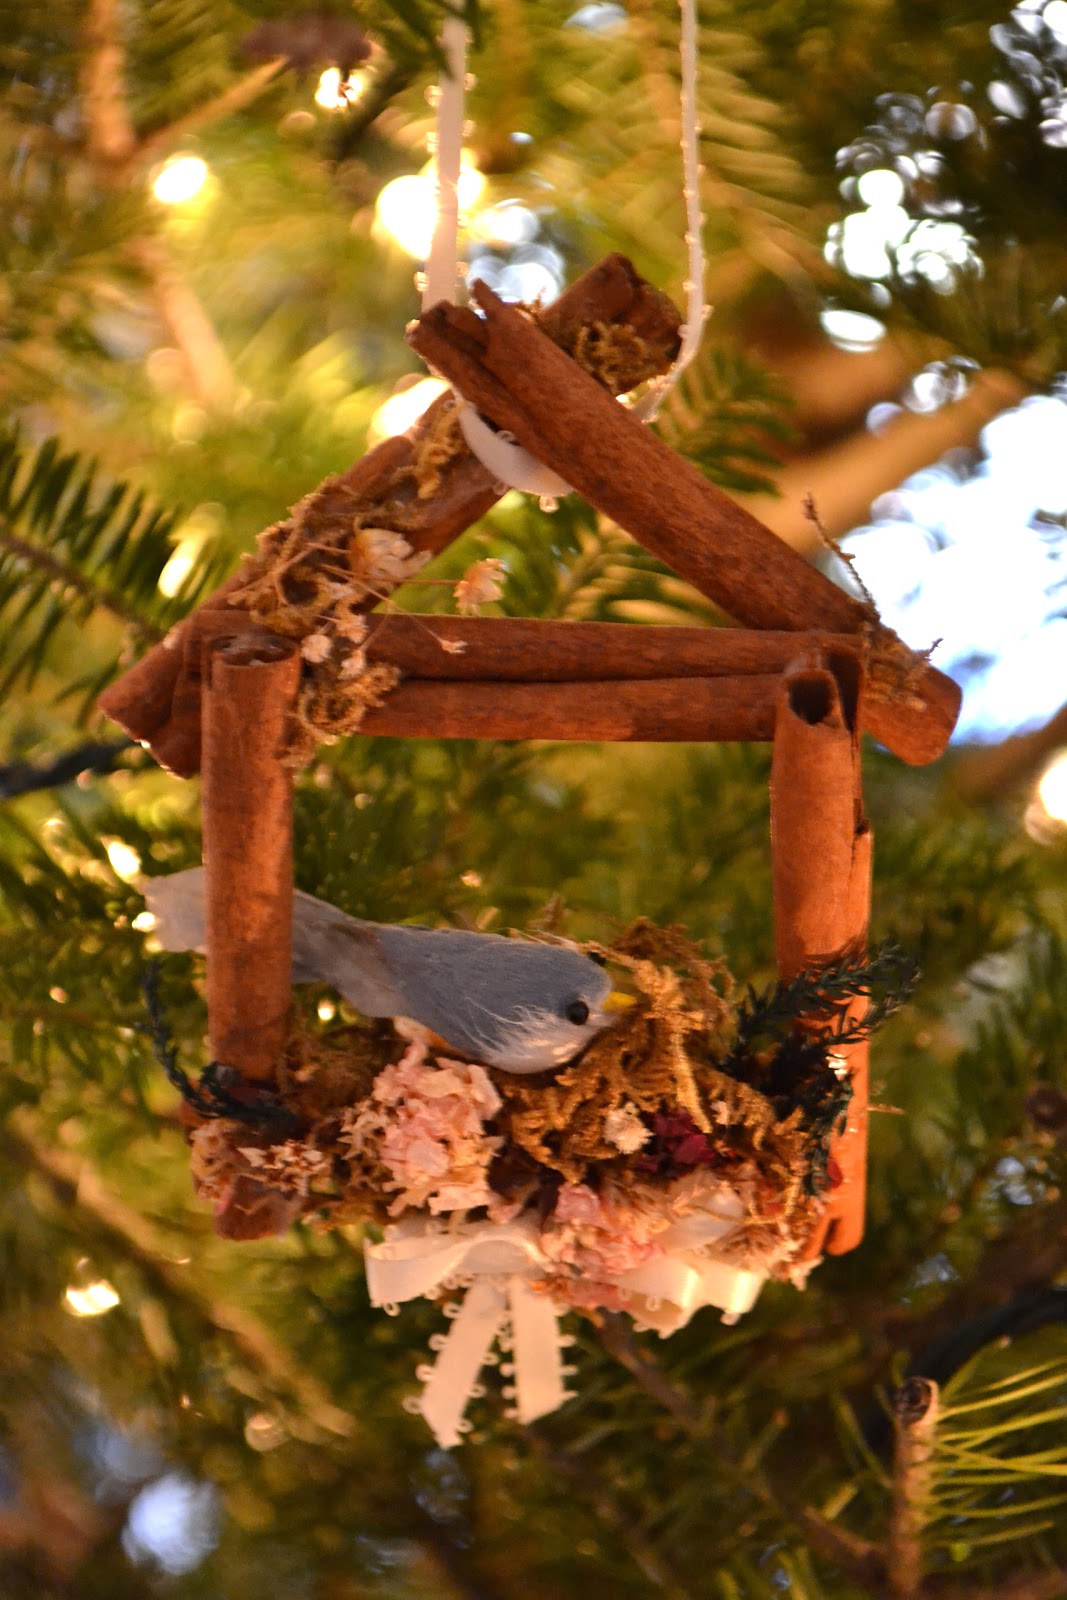
This adorable bird nest ornament is super easy to make with your kids.  As I've mentioned before, my mom is pretty crafty and I made this ornament with her a long time ago.  You can find all of the materials at the craft store, but you might need to stop by the grocery store for the cinnamon sticks.  

You will need:
6 cinnamon sticks
Ribbon
A cute tiny bird
Nest materials-- you could use mossy stuff from the craft store, twigs, raffia, shredded paper, etc...
Dried flowers
Glue -- hot glue works great!

1.  Glue your cinnamon sticks together to form a house shape.  Make a square with 4 sticks and then use 2 to create a triangle on top.  
2.  Form a nest with your nest materials.  Glue it to the cinnamon stick house.  
3.  Glue your bird in the nest.
4.  Decorate the nest and cinnamon stick house with dried flowers and a ribbon.

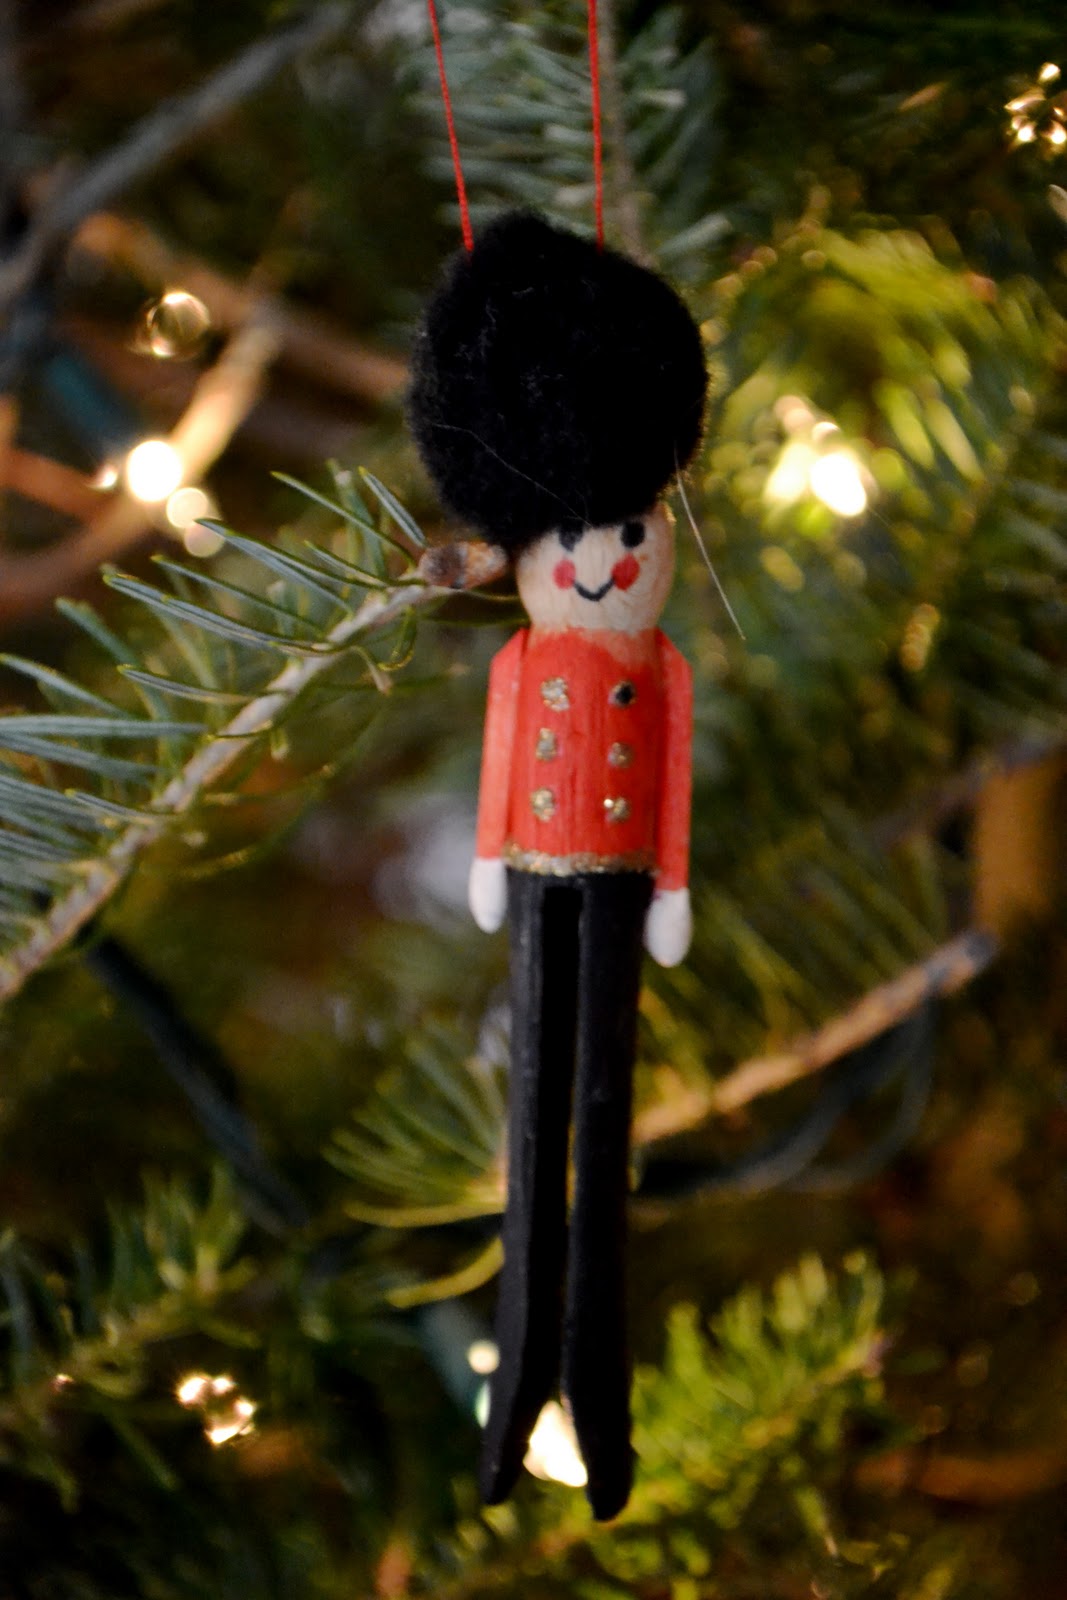
Isn't this little nutcracker ornaments so cute?!  I'm pretty sure he's my handiwork.

To make the nutcracker ornament you will need:
1 Old fashioned clothes pin
Paint
Fine tip Sharpie marker
Black pom pom
2 Wooden matches
Thread or ribbon for hanging the ornament

1.  Glue 2 matches to the sides of the clothes pin for arms.
2. Paint the clothes pin to look like a nutcracker-- black pants, red shirt, gold belt and buttons, and whatever color skin and features you like.  A fine tip Sharpie marker would be great for the eyes and mouth.
3.  Glue the pom pom on top of your clothes pin.
4.  Glue thread or ribbon to the back of the ornament to hang on the tree.

Monday, December 19, 2011

Ocean Ornaments Tutorial

To make a beautiful Ocean Ornament of your own, you will need:
Paint-- white and shades of blue
Paint brushes
Sponge
Flat ornament-- glass or plastic.  I bought mine at Michaels
Sand-- I brought some home from the beach, but any craft store should have sand.
Strong Glue (Optional)
 First paint your horizon 1/3 of the way down on the ornament.  
 Paint a line below the horizon in a different shade of blue.
 Continue painting lines in different shades of blue to create your ocean.  Use your sponge to create the tide about 2/3 down from the top of the ornament.  
Fill your ornament 1/3 full with sand.   
Optional: You can put a small amount of strong glue to the cap of the ornament to permanantly seal it closed.  This will avoid any sand spillage when you store it away for next year!  
I have a Martha Stewart stencil that says "Merry Christmas" -- you could stencil or paint a holiday sentiment or maybe the name of the beach your sand is from.  

Post pictures of your ornaments on Mister G's Facebook page or twitter @MisterGandMe 
Merry Christmas!!  

Monday, November 14, 2011

Gift Wrap Ideas

Happy Monday friends!  Hope you all had a great weekend!  

One of my more popular Pinterest Boards is titled "Gift Wrap Ideas".  It's never too early to start planning for fabulous gifting.  Here are some of my favorites:


Do you have some great gift wrap ideas?  Share them in the comments section, on Facebook, or twitter @MisterGandMe .  

xoxo,
Ashley and Mister G


Fashion Trend © 2011 | All Rights Reserved | About | Privacy Policy | Contact | Sitemap