Happy Tuesday, friends! I'm so happy to have my friend Ashley from Sugar Mama Bakeshop guest post today! Ashley writes an amazing blog featuring gluten-free / vegan recipes with beautiful photos! Her recent Peanut Butter Cookies post is my favorite! Ashley also owns an Etsy shop where she sells vegan/gluten-free cupcake mixes, frosting mixes, and cookies. I asked Ashley to share a simple, "normal" ingredient recipe with us. Sometimes the gluten-free/ vegan recipes can be so intimidating!
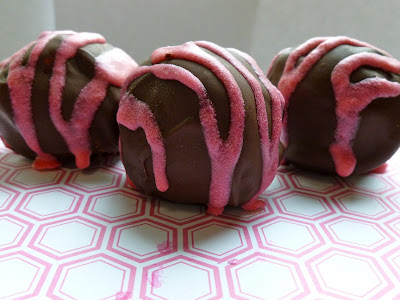
Hi there! I'm Ashley the mama/baker behind Sugar Mama Bakeshop. I'm so excited to be here on Mister G and Me! I love Ashley's fun DIY & wedding ideas :) These cake truffles are actually a lovely addition to a dessert table or even make a great party favor! The recipe is designed to be gluten free & vegan (all of my recipes are), but you can easily use any cake/frosting you like! I found myself with extra coconut, almonds and a (slightly sunken) chocolate cake one day. And that's how the Almond Joy truffles were born :)
  The great thing about these is you can swap out for any flavors & mix ins you want. So they can be different every time! Or add a stick and you've got a cake pop :)
Hi there! I'm Ashley the mama/baker behind Sugar Mama Bakeshop. I'm so excited to be here on Mister G and Me! I love Ashley's fun DIY & wedding ideas :) These cake truffles are actually a lovely addition to a dessert table or even make a great party favor! The recipe is designed to be gluten free & vegan (all of my recipes are), but you can easily use any cake/frosting you like!
 I found myself with extra coconut, almonds and a (slightly sunken) chocolate cake one day. And that's how the Almond Joy truffles were born :)
  The great thing about these is you can swap out for any flavors & mix ins you want. So they can be different every time! Or add a stick and you've got a cake pop :)
 {Almond Joy} Cake Truffles
from Sugar Mama Bakeshop
ingredients:
-your fave chocolate cake-baked & cooled according to instructions
(you can buy a gluten free/ vegan mix right here)
-1-1 1/2 cups vanilla frosting
(there's a mix for that too)
-about 1 cup of whole raw almonds cut into halves
-1/2 cup shredded coconut
-2-2 1/2 cups vegan dark chocolate chips
-2 tsp Spectrum organic shortening
instructions:
-crumble cake into fine crumbs (easiest way is to use your hands... don't be afraid to get messy!)
-add frosting, almonds & coconut and mix together (the amount of frosting really is a personal preference depending on how you like the texture. As long as they're sticky enough to roll together you're good to go!)
-using a cookie scoop (or tablespoon) scoop mixture onto parchment lined cookie sheet and shape with your hands to make them nice and round.
-freeze for at least half an hour.
-when truffles are nice and chilled they're ready to dip into chocolate! I found that a toothpick inserted into each one was the best way to coat them evenly and finish with a smooth coating.
-Melt together chocolate and shortening and dip away (I would recommend doing this in 2 or 3 batches so the chocolate stays warm and smooth!)
-If you're decorating with sprinkles makes sure you add them before the chocolate cools, if you're using frosting on top (like I did) you'll add that after the chocolate hardens.
-Put the truffles back in the freezer for 30 minutes- 1 hour.
-They keep perfectly in a sealed container in the freezer!


0 comments:
Post a Comment